
Introduction
In the previous installments in this series, we worked on the backend for a simple todolist. Now it is time to have some fun in the frontend by using HTMX.
We will also use tailwind css for our styling. To render our HTML content, Gin provides us with some form of templating.
Setting up templating
Setting up templating is quite easy. In our previous article we already made sure the templates are loaded, however the templates directory does not yet exist, so you need to create a templates directory in the root directory of your project.
The base of it all: index.html
Like so many websites we will start with an index.html file so add that to your templates directory, and it should read like this:
<!DOCTYPE html>
<html lang="en">
<head>
    <meta charset="UTF-8">
    <meta name="viewport" content="width=device-width, initial-scale=1.0">
    <title>To do list with Go, Gin, Gorm and HTMX</title>
    <script src="https://cdn.tailwindcss.com"></script>
</head>
<body>
<div class="container mx-auto mt-8">
    <h1 class="text-3xl font-bold mb-4">To do list with Go, Gin, Gorm and HTMX</h1>

    <div id="todo-form">
        <form hx-post="/api/v1/items/html"
              hx-target="#todo-list"
              hx-ext="json-enc">
            <div class="flex mb-4">
                <input type="text" name="title" placeholder="Title" class="w-full px-4 py-2 rounded-md border border-gray-300 focus:outline-none focus:ring-1 focus:ring-blue-500">
                <button type="submit" class="ml-2 px-4 py-2 text-white bg-blue-500 rounded-md hover:bg-blue-700">Add Item</button>
            </div>
            <textarea name="description" placeholder="Description" rows="3" class="w-full px-4 py-2 rounded-md border border-gray-300 focus:outline-none focus:ring-1 focus:ring-blue-500"></textarea>
        </form>
    </div>

    <div id="todo-list" hx-trigger="load" hx-get="/api/v1/items/html" hx-target="#todo-list">

    </div>
</div>

<script src="https://unpkg.com/htmx.org@1.9.10"></script>
<script src="https://unpkg.com/htmx.org/dist/ext/json-enc.js"></script>

</body>
</html>
If you want to know more about the tailwind CSS tags, have a look at the documentation. It is beyond the scope of this article to discuss them extensively. Have a look at the docs if you want to know more. It took me quite some experimentation and some help from co-pilot to get things right and looking reasonable.
What is much more interesting, are the htmx tags, and some explanation is needed there:
hx-postis used to define the url to which form posts when submitted.- In the
hx-targetwe set the HTML element which will receive the HTML from the API - Because our API only accepts JSON as input, I use the
hx-extand set it tojson-encto make sure the form values are submitted in JSON format - In the
todo-listdiv we use theloadtrigger to make sure we get the items from the API and populate the div with them. There are many possible triggers, and theloadtrigger is triggered by the page load event.
Listing our stuff: the list.html file.
So far, so good, but the index.html is still quite static, in the sense that no real templating takes place. That will change when we render the list of todo-items in the list.html file:
{{ range .items }}
<div class="flex items-center justify-between p-4 rounded-lg shadow-md bg-white">
  <div class="flex items-center">
    <input type="checkbox" id="finished" class="mr-2 rounded focus:ring-0" {{ if .Finished }} checked="checked" {{ end }}>

    <label for="finished" class="text-gray-700 opacity-50"> {{ .Title }}
    </label>
  </div>

  <p class="text-gray-500 text-sm">{{ .Description }}</p>

  <div class="flex space-x-2">
    <button type="button"
            hx-swap="#todo-list"
            hx-delete="items/html/{{ .Id }}"
            hx-confirm="Are you sure you want to delete this item?"
            class="inline-flex items-center px-2 py-1 text-xs font-bold leading-tight text-red-500 hover:bg-red-100 focus:outline-none focus:ring-0 focus:ring-offset-2 focus:ring-red-500"
      >
      Delete
    </button>

    <button type="button"
            hx-swap="#todo-list"
            hx-post="items/html/toggle/{{ .Id }}"
            class="inline-flex items-center px-2 py-1 text-xs font-bold leading-tight text-blue-500 hover:bg-blue-100 focus:outline-none focus:ring-0 focus:ring-offset-2 focus:ring-blue-500"
    >
      Toggle Finished
    </button>
  </div>
</div>
{{ end }}
Some notes:
- Because there is usually more than one item, we range over the items, that is the
{{ range .items }}and{{ end }}tags. - In the checkbox we use an if state to make sure it is checked if an item is finished.
- We use
{{ .Title }}and{{ .Description }}to display the fields in each item. - Next we come to the delete button, which is colored red. In it we again see a
hx-deletetag, to make sure the API gets the correct HTTP verb. Because our API call returns an updated list, we set thehx-swapvalue to#todo-list. Since deleting items is a destructive operation, we use ahx-confirmtag to show a confirmation dialog. - We more or less follow the same procedure for the Toggle Finished button, only we use a post here, since this action changes the underlying data.
Displaying a single item: the item.html file
Sometimes it is handy to display a single item. I included this for completeness, as it is more or less equivalent to the list.html file:
<!DOCTYPE html>
<html lang="en">
<head>
    <meta charset="UTF-8">
    <title>Item {{ .Id }}</title>
</head>
<body>
<div class="flex items-center justify-between p-4 rounded-lg shadow-md bg-white">
    <div class="flex items-center">
        <input type="checkbox" id="finished" class="mr-2 rounded focus:ring-0" {{ if .Finished }} checked="checked" {{ end }}>

        <label for="finished" class="text-gray-700 opacity-50"> {{ .Title }}
        </label>
    </div>

    <p class="text-gray-500 text-sm">{{ .Description }}</p>


</div>
</body>
</html>
When things go wrong: the error.html
Because things that can go wrong will go wrong, as Murphy’s law states, I included an error page:
<!DOCTYPE html>
<html lang="en">
<head>
    <meta charset="UTF-8">
    <title>An error occurred</title>
</head>
<body>
<h1>An error occurred</h1>
<p>The following error occurred: {{ .error }}</p>
</body>
</html>
When rendered, this page gets an error passed to it, which it displays.
Time to test
So, quite a big thing to build, let’s test. In your commandline or terminal type the following:
go run .If things go right, you can now open the following URL in the browser of your choice:
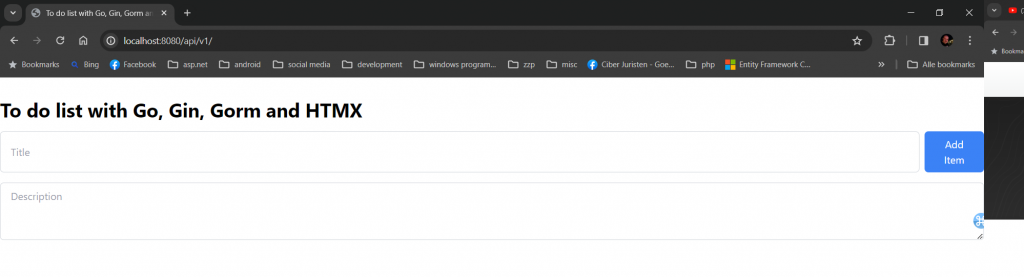
http://localhost:8080/api/v1/And you should see something like this:
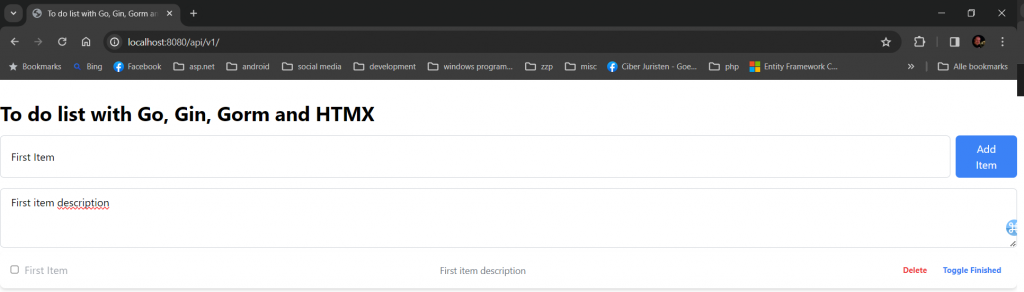
Now try adding an item and you should see something like this:
You can now experiment, update or change this project.
Conclusion
Working with new technologies, like Gin, Gorm but also HTMX and tailwind proved challenging at some times, however, all of these technologies ultimately make things easier. I was pleasantly surprised by how easy some things become by using these technologies.
There are some possible enhancements, as there always are:
- Clean up the code, both the Go and the template code. I feel things could be even simpler.
- Make sure that for example that our textfields are cleared after submitting
- Drag and drop in the to-do list to prioritize items.
- Edit items to update them
- Authentication and authentication
All of these issues will be addressed in the next installments.
Anyway, I had lots of fun learning and writing these four articles, I hope you will feel that as well. Please let me know if you need help or have some ideas for improvements.
